- Step 1 – Login to bigrock.com or bigrock.in and click your domain
- Step 2 – Click Child Name Servers
- Step 3 – Enter Givan Nameservers and IP Address in the box
- Step 4 – Click Name Servers.

How to set private name servers in namesilo.com

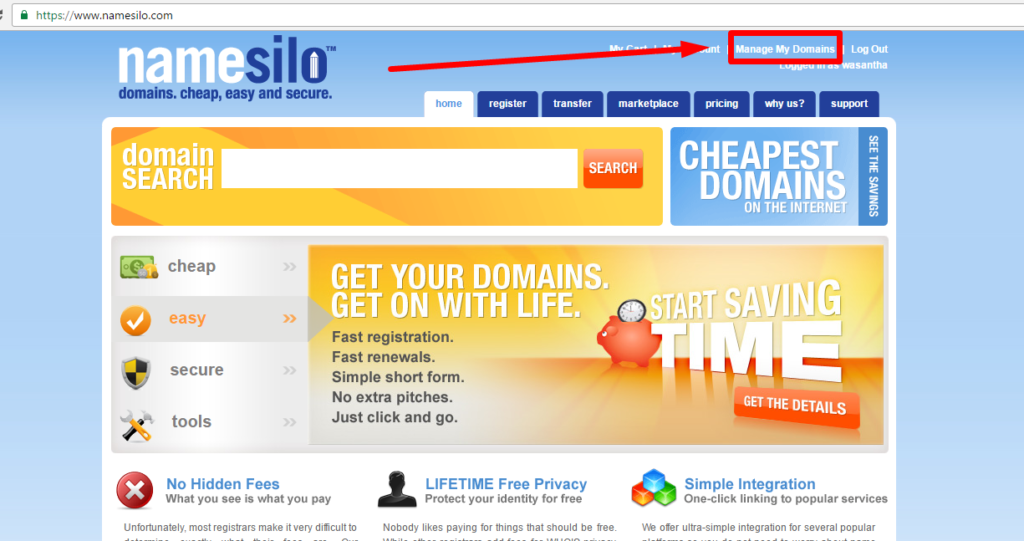
Step 2 – Click to the Domains that you want from the list
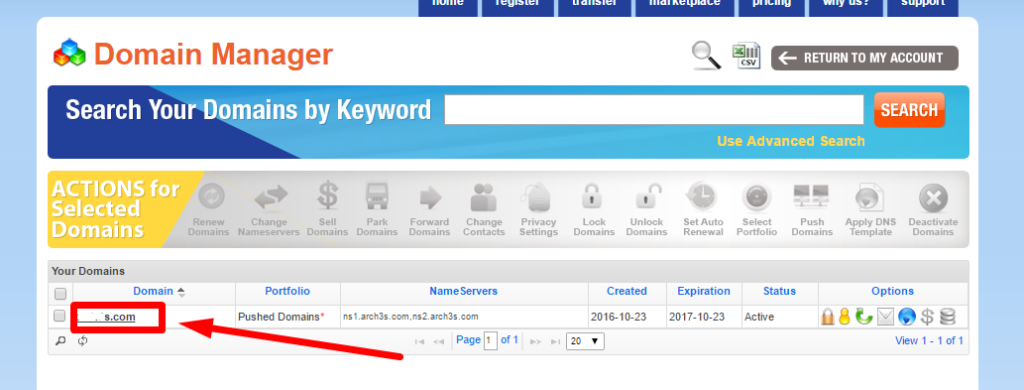
Step 3 – Go to View/Manage Registered NameServers

Step 4 – Click Register New NameServers Button.

Step 5 – Enter ns1 to Host and the IP to Host IP 1. Then click Submit.
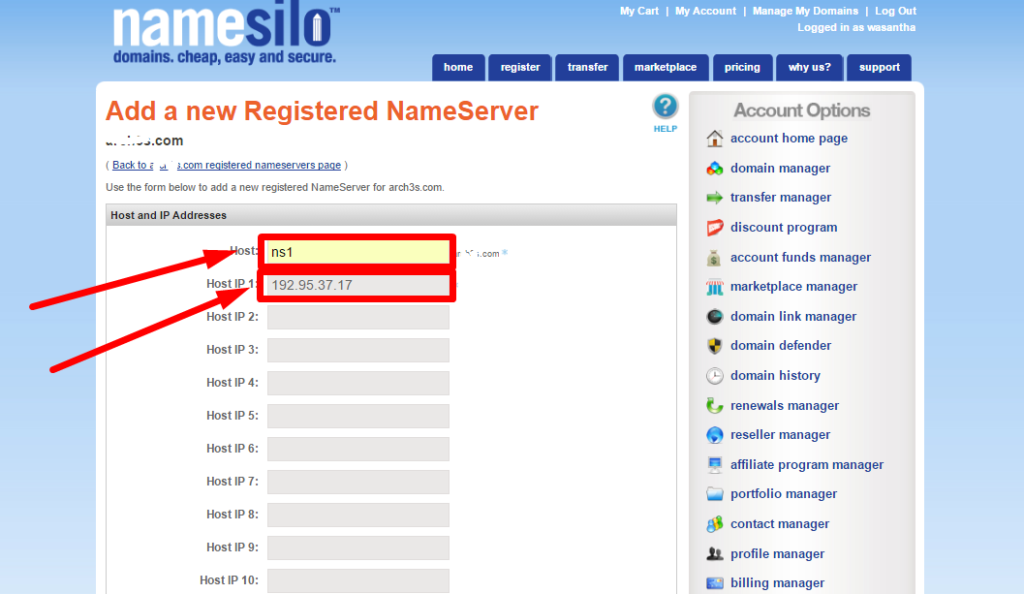

Step 6 – Click Register New NameServers Button again.
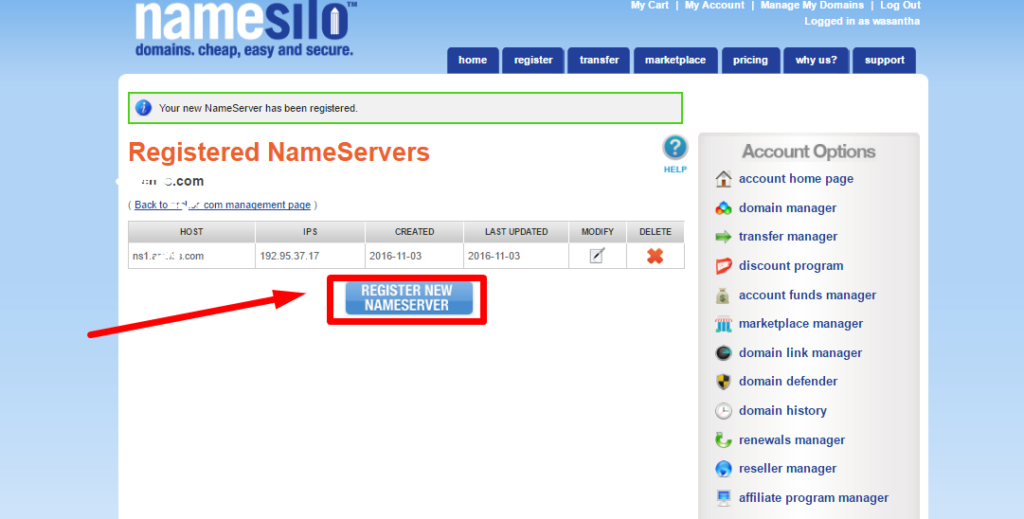
Step 7 – add Ns2, give the IP and click Submit.

Step 8 – Click (Back to xxxxx.com management page ) link

Step 9 -Click Change Link near the Name Servers.

Step 10 – Change the Name Server 1 and Nameserver 2 with created nameservers in previous steps. Then Click Submit.


Step 11 – Done.
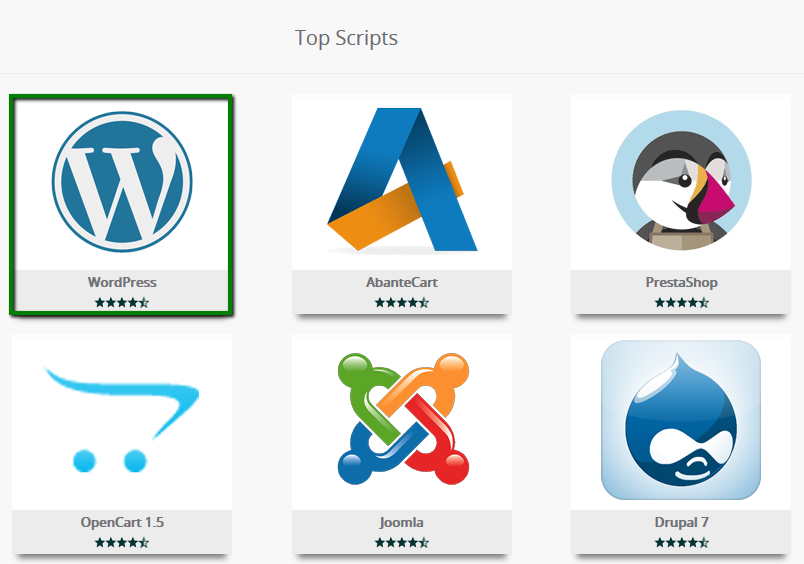
Simply login to your cPanel account and look for Softaculous icon or WordPress installer icon. You will find them under Auto Installers section.
![]()
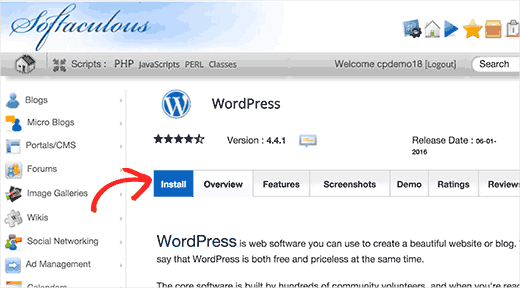
Clicking on any of these icons will launch Softaculous auto-installer for WordPress. First you will see an overview of WordPress. You need to click on the Install tab to continue.
Softaculous will now ask you where you want to install WordPress. You need to choose http:// or http://www. as protocol.
If your site has SSL and HTTPS, then you can select https:// or https://www. as protocol.
After that, you need to choose the domain name where you want to install WordPress. Most users want to install WordPress in their domain’s root directory, like example.com. In that case, you need to make sure that the ‘In Directory’ field is blank.
Scroll down a little, and you will see the site settings section.

Under this section, first you need to provide a title and description for your WordPress site. Don’t worry you can easily change them from your WordPress admin area after installation.
Next, you need to choose an admin username, password, and email address. Softaculous will automatically fill in the username and password fields for you. It will use a non-dictionary word for username and a strong password.
You can change them if you want so that they are easy to remember for you. However, we strongly urge you to always use a strong password.
Make sure that you enter correct email address in the admin email field. This is where WordPress will send notifications and password reset link if you ever forgot your password.
Rest of the options on the screen are optional. You can now click on the install button to run the installer.

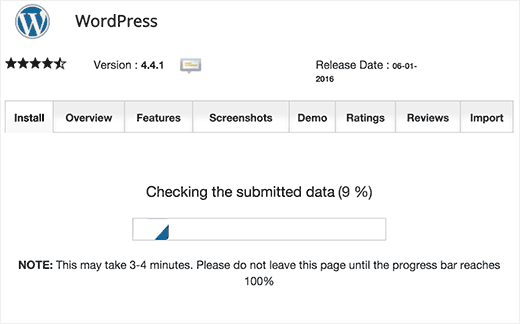
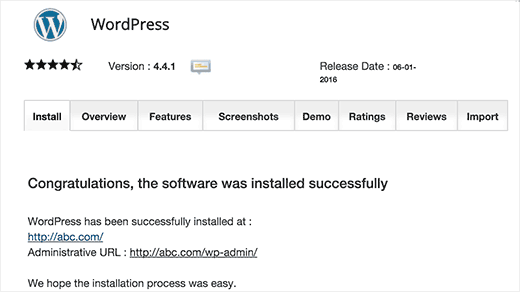
Softaculous will run the installer using the settings you provided. You will see a progress bar with installation status. It will take a couple of minutes, do not close the window until the progress bar reaches 100% otherwise this may affect your WordPress installation.
You will see a success message after the installation is finished. It will also show you a link to your website and another link to your WordPress admin area.
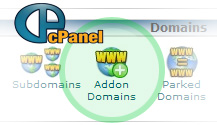
1) Once you are logged into your cPanel account, select “Addon Domain” under the “Domains” section:

2) you will need to fill out the details of the add-on domain
| New Domain Name: | Enter the domain name you are adding to your cPanel. |
| Subdomain / Ftp Username: | When adding a new domain to your account, cPanel automatically configures an additional FTP user for this domain. While most users doesn’t need or use this account, cPanel requires that you enter an ftp username to continue. |
| Document Root: | The document root is the directory where the files for this website will be located. The default directory for new domains is public_html/NewDomain |
| Password | The password you enter here is the FTP password for the FTP user mentioned above. As previously stated, most users don’t use this new FTP account, but cPanel requires that you enter a password here. |
| Password (Again): | Enter the above password again to ensure you are typing it correctly. |
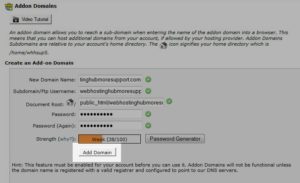
3) Once you are finished filling in the details, select the “Add Domain” button.
4) Change Name Servers same as your primary domain.
5) Done.
Knowing how to reset your WordPress password from phpMyAdmin is one of the essential things you should know about because for some reason if your site is hacked, or something else, you are no longer able to login to your admin panel using the login information, and you are not able to reset the password via email, this method can be very useful.
I assume that you have already know how to access your cPanel. Just type yourdomain.com/cpanel or cpanel.yourdomain.com (ex:http://www.wasantha.net/cpanel) in the address bar in the browser.
Every WordPress blog uses a MySQL Database which can be accessed through your phpMyAdmin even if you are not using cPanel hosting. Follow the following steps to reset your WordPress password:
It is always good to know the name of your WordPress Database. Sometimes you might be running multiple installations within the same database, then you will need to know exactly where to look for to reset the password. The best place to look is your wp-config.php file which is located in your root WordPress Directory. In there you will find the name of your database. (You can open wp-config.php file in the File Manager in cPanel)
In your cPanel or other admin panel, you will need to access your MySQL database and then browse it via phpMyAdmin.

Once you are in phpMyAdmin, you will need to select the correct database on the left hand side. Look for the name that you found in your wp-config.php and click on that. You will see a list of tables with a prefix wp_ for the most part.
If you changed your prefix during installation, then you would be looking for that specific prefix “for ex: wp673_”.
You will look for the table wp_users, click on it and then click on the Browse Tab.

Click on the Pencil (Edit) Icon to reset your Password.

Now you will see a field that looks like this:
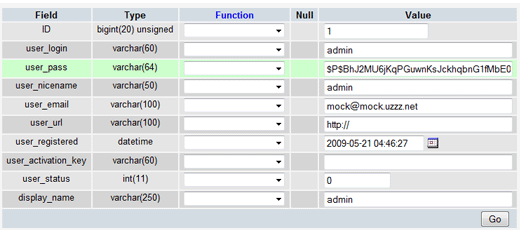
Edit the user_pass field value. You will notice that there are a lot of random characters in the password field. Due to security reasons, WordPress stores the passwords as MD5 Hash rather than Plain text.
This means that you will not be able to enter plain text as the password. You would need to use one of the MD5 generators online to generate your password.
Recommended Tool: JavaScript MD5
Simply type your password in that tool and generate MD5 results. Copy and paste the code you get from the converter into your phpMyAdmin field and click Go to save changes.
You have now successfully changed your WordPress Password from phpMyAdmin.

![]()
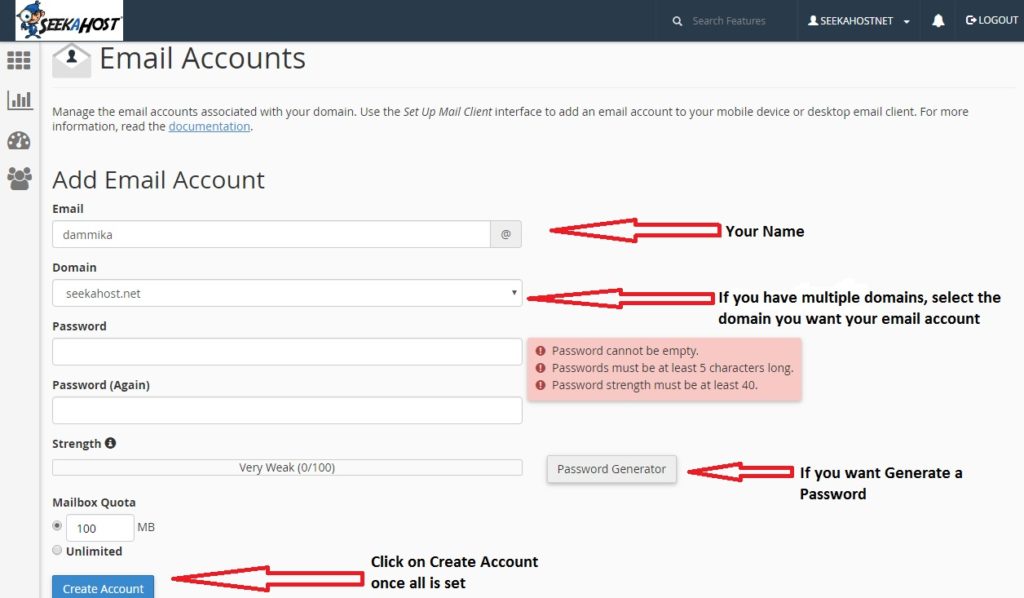
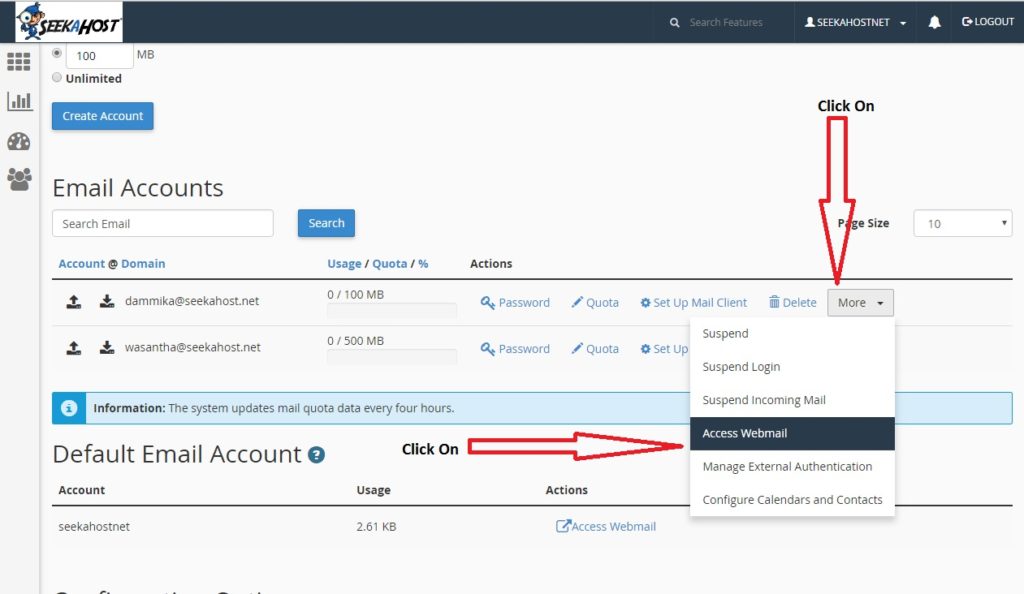
http://webmail.yourdomain.com
https://yourdomain.com:2096
https://yourdomain.com/webmail
cPanel Tutorials – How to manage your website with cPanel. Our cPanel Tutorials explain how to use File manager and manage permissions, create Email, manage Domains and DNS zones, get Backups, work with FTP.
Account Info & Stats – cPanel Domains Section Tutorial – cPanel Files Section. Cpanel Tutorial – Cpanel help for beginners.
For cPanel & WHM cPanel, WebHost Manager, and WHM are registered trademarks of cPanel, Inc.
One of the most common questions new users ask is “How do I log in to my cPanel now that I have this fancy new server?” In this article we will talk about. How to Manage Website Using cPanel & WHM – Tutorials by Wasantha.
Get the most out of your web hosting with seekahsot.com with our free video tutorials on cPanel and WHM, the industry-leading web hosting control panels. Although the installation for cPanel is relatively simple, the script does.

cPanel Tutorials – How to manage your website with cPanel. This cPanel Tutorials explain how to use File manager and manage permissions, create Email, manage Domains and DNS zones, get Backups, work with FTP, cPanel Domains Section, cPanel Files Section, cPanel Mail.
This cPanel Tutorial help for beginners. This is part 2 of a cpanel tutorial. In this part we will be going over the preferences section in your cpanel. cPanel Video Tutorials is
You will be a pro in no time with cPanel’s video. A guide to creating and modifying MySQL databases in cPanel.
Click the Video Tutorials icon to open an interface from which you can access various video tutorials. This feature can be beneficial to new users who wish to learn
cPanel User Documentation cPanel.cPanel Documentation. For cPanel & WHM 54. cPanel, WebHost Manager, and WHM are registered trademarks of cPanel, Inc.

Step 1 : Log into your cPanel interface (yourdomain.com/cpanel)
Step 2 : Look for the Databases category and click on the phpMyadmin icon.

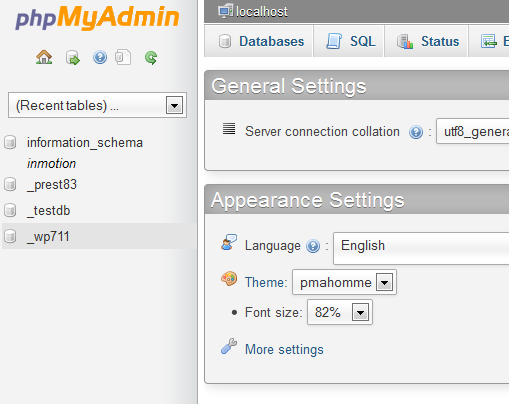
Step 3 : Once inside the phpMyadmin look to the left hand sidebar and click on your specific WordPress database.
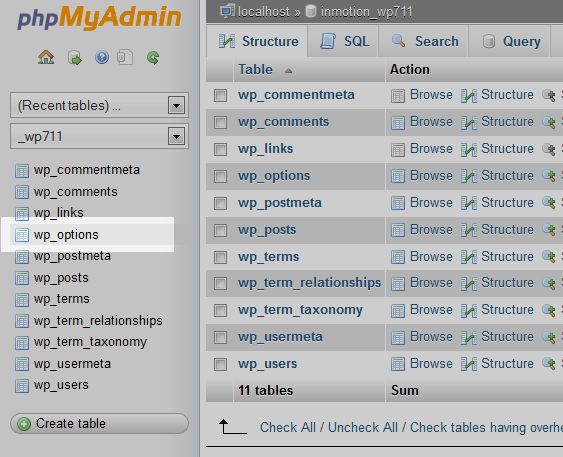
Step 4: From there, select the wp_options table.
Step 5 : Once the table is opened, look to the tab menu on the screen and click on the Browse tab option. This allows you to browse the columns broken down into pages. Click on the Show All option at the top so it will list all the columns on one page.
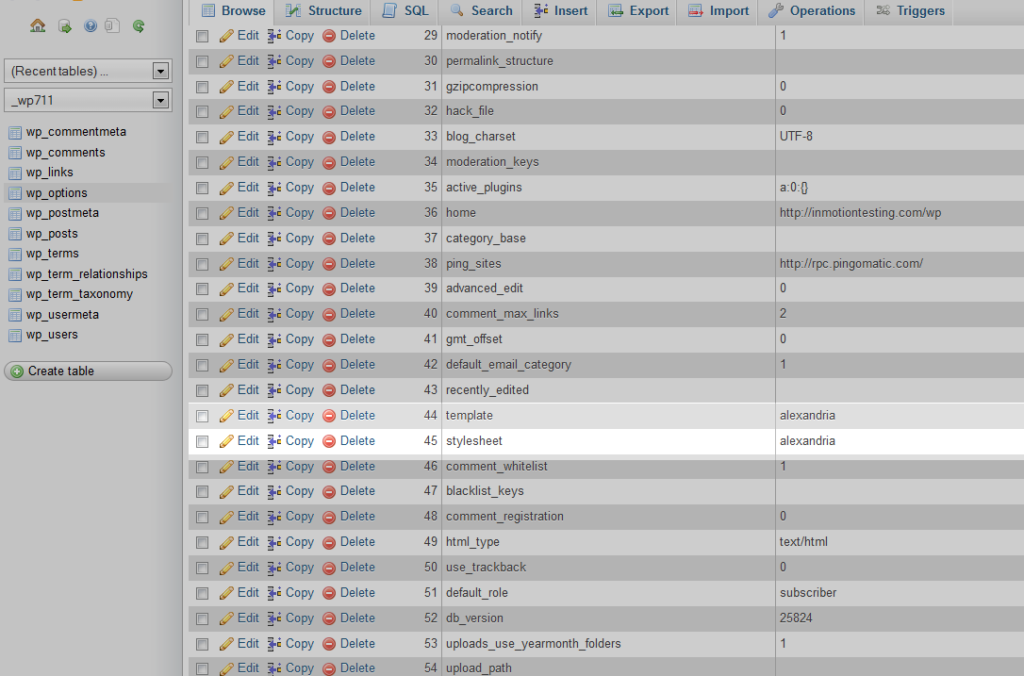
Step 6: Next, you will need to locate two rows on the page, the template and the stylesheet. Pick template and click on the Edit link.
Step 7: This will take you to the edit page where we will change the data for the option_value. In our example, the value is set for the alexandira template. Change this to the default theme name, twentythirteen and click on the Go button at the bottom of the page.
Step 8: Perform the same procedure on the stylesheet row. When you finish the stylesheet and return to the list, you should see the new theme in the value portion of the list for both. You can now visit your website and see that it is using the default theme. From here you should also be able to log into your wp-admin area.