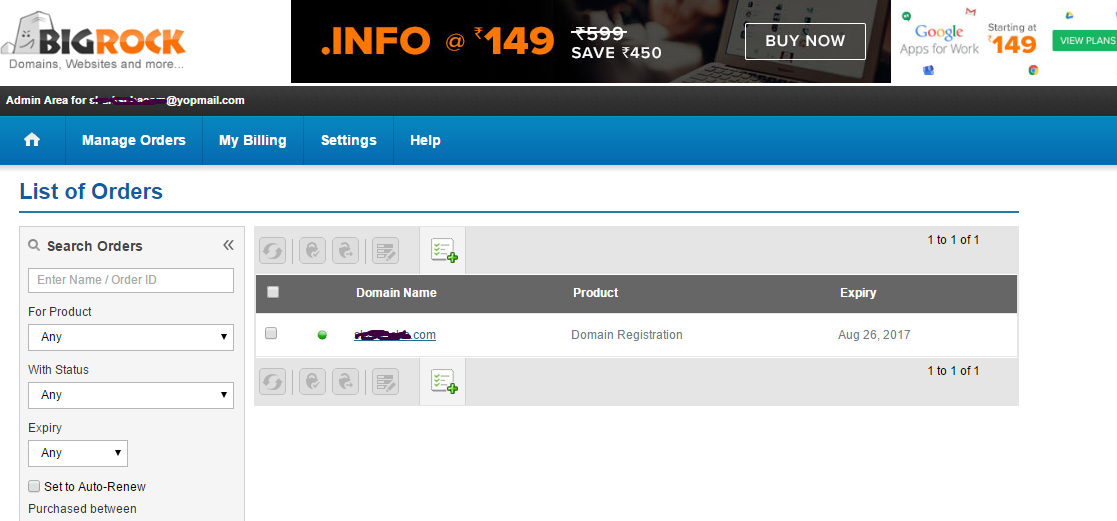
- Step 1 – Login to bigrock.com or bigrock.in and click your domain

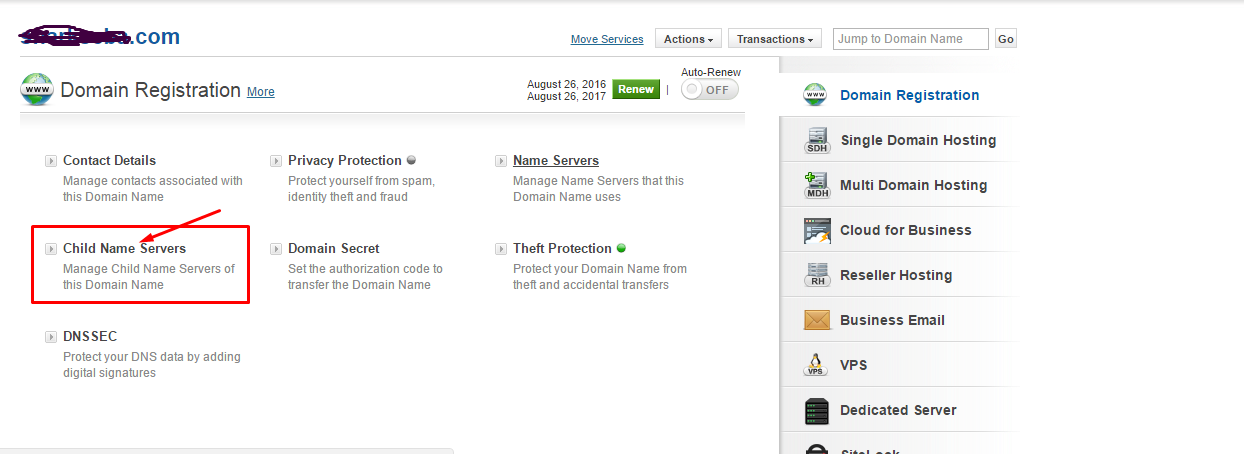
- Step 2 – Click Child Name Servers
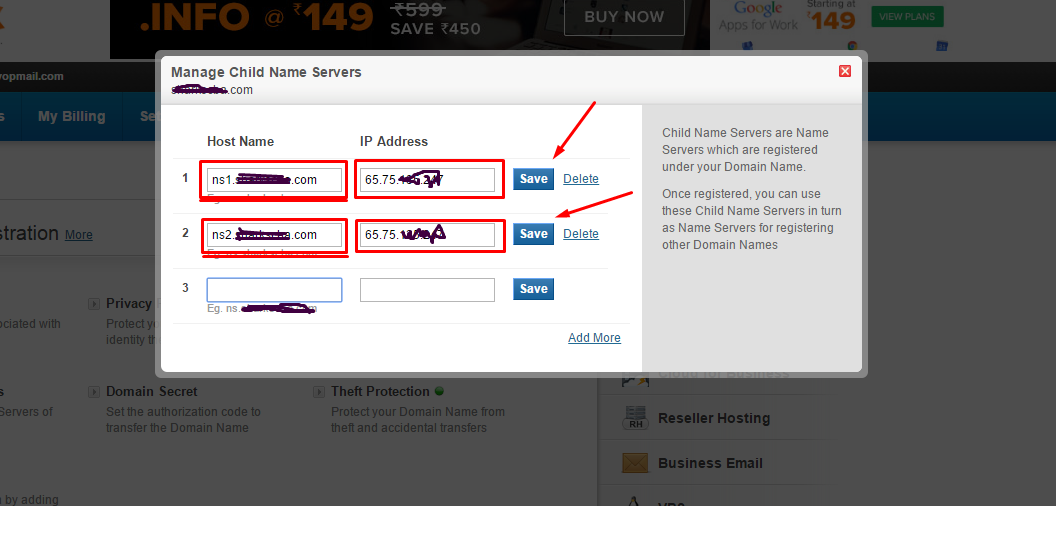
- Step 3 – Enter Givan Nameservers and IP Address in the box
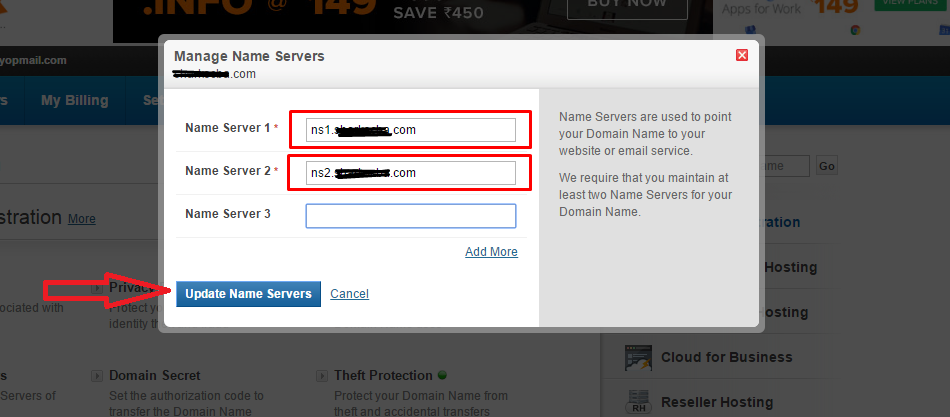
- Step 4 – Click Name Servers.

- Step 5 – Select Custom Option and Enter you name servers you added in previous steps. ns1.<yourdomain> and ns2.<yourdomain>. Then click Update Name Servers.
- Step 6 – Done. You need to wait some time and refresh the page to see the newly added details.